Buffering on a live stream frustrates viewers and kills engagement. The good news: it almost always comes from a specific, fixable cause. Here's how to diagnose and resolve it systematically.
The Most Common Causes
- OBS bitrate too high for your upload speed
- Unstable or congested internet connection
- CPU or GPU overload causing encoding lag
- Platform-side bitrate limit exceeded
- Wi-Fi packet loss
- ISP congestion during peak hours
Step 1: Check OBS for Dropped Frames
Open OBS while streaming. Look at the bottom status bar. If you see dropped frames (shown as a percentage), your stream is already buffering before it even reaches viewers.
- 0% dropped: encoding and upload are fine; the buffering is happening elsewhere
- 0.1–2% dropped: minor network instability, reduce bitrate 10–15%
- >2% dropped: significant problem; see the OBS dropped frames guide
Step 2: Test Your Upload Speed and Stability
A speed test number is not enough. You need to test upload stability, not just peak speed.
Run a 60-second upload test at fast.com or speedtest.net, then compare:
- Does the upload speed stay consistent or does it spike and drop?
- Run a ping test to your ingest server: what matters is a steady value with no spikes or lost replies, not the absolute number
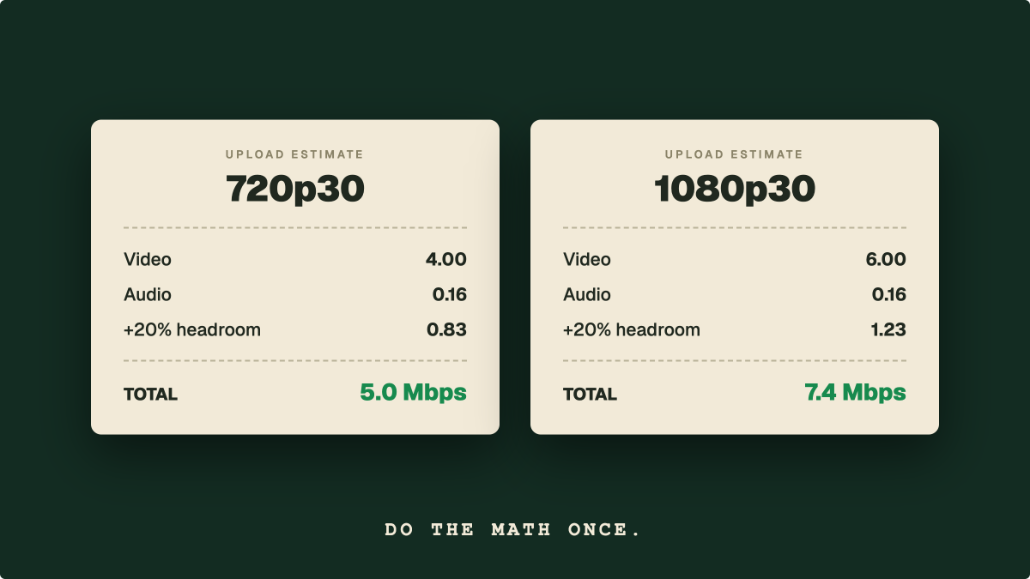
Rule: Your OBS bitrate should never exceed about 70% of your stable upload speed. For a 20 Mbps upload, keep OBS bitrate under 14,000 Kbps. For 10 Mbps upload, stay under 7,000 Kbps.
Step 3: Lower Your OBS Bitrate
In OBS: Settings → Output → Bitrate
Try reducing by 1,000 Kbps increments:
- Start streaming test at 6,000 Kbps → still buffering → try 5,000 → try 4,000
For most stable streams:
- Strong home connection (50+ Mbps upload): 5,000–6,000 Kbps
- Average home connection (20–50 Mbps): 4,000–5,000 Kbps
- Moderate connection (10–20 Mbps): 2,500–4,000 Kbps
Step 4: Switch to Wired Connection
Wi-Fi introduces packet loss and jitter even at high speeds. If you're streaming over Wi-Fi:
- Plug in an Ethernet cable directly to your router
- Restart OBS and test again
This single change fixes buffering for a large percentage of streamers. Wi-Fi interference from neighboring networks, microwaves, and device congestion can all cause brief packet bursts that manifest as buffering.
Step 5: Check CPU and GPU Usage
Encoding is CPU or GPU-intensive. If your system is overloaded, frames get dropped before they're even sent.
In OBS, watch for the red "Encoding overloaded!" warning in the status bar, or open View → Stats and check "Skipped frames due to encoding lag". If either shows up:
- Using x264: switch to a faster preset (Settings → Output → CPU Usage Preset → go faster: medium → fast → faster → veryfast → superfast → ultrafast)
- Using NVENC/AMF: lower quality preset or bitrate
- Close background applications (Chrome tabs, Discord video, games with high GPU usage)
Step 6: Check Platform-Side Limits
Even if your upload is fine, some platforms limit the ingest bitrate they accept (figures checked October 2026):
| Platform | Ingest Bitrate Limit |
|---|---|
| Facebook Live | 6,000 Kbps (1080p30), 9,000 Kbps (1080p60) |
| Twitch | 6,000 Kbps for standard streams (higher only via Enhanced Broadcasting for Affiliates and Partners) |
| YouTube | No fixed cap; stay within the recommended range for your resolution |
| Instagram Live | 2,250–6,000 Kbps |
If you're multistreaming and one platform is getting a higher bitrate than it accepts, it may reject or degrade the stream. Set your OBS bitrate to the lowest limit among your destinations; 6,000 Kbps works for Facebook, Twitch and YouTube at 1080p30.
Step 7: Rule Out ISP Congestion
Some ISPs throttle upload bandwidth during peak hours (evenings on residential plans). Test:
- Stream at 8 PM → buffering
- Stream at 11 AM → fine
If the problem is time-of-day dependent, it's likely ISP congestion. Options:
- Reduce bitrate during peak hours
- Switch to a business-grade internet plan
- Use a streaming server in a data center with dedicated bandwidth
Step 8: Try SRT Instead of RTMP
If you're streaming from a venue or on a cellular connection, switch from RTMP to SRT. SRT recovers from packet loss by retransmitting lost packets within a configurable latency buffer instead of dropping them, which keeps the stream watchable on lossy cellular or venue connections where RTMP would stutter. Livepush supports SRT ingest alongside RTMP.
Quick Diagnosis Checklist
□ OBS dropped frames > 0%?        → Lower bitrate
□ Bitrate above 70% of upload?     → Lower bitrate or upgrade connection
□ Streaming over Wi-Fi?            → Switch to Ethernet
□ CPU encoding lag in OBS?         → Faster preset or NVENC
□ Facebook destination in stream?  → Keep bitrate at or below 6,000 Kbps for 1080p30
□ Problem only at certain hours?   → ISP congestion
If none of these fix it, open a ticket with your streaming platform or Livepush support. The issue may be on the ingest server or CDN side.
Stream without the headaches
Livepush handles infrastructure, redundancy, and reliability.